Who would have thought? An old Chevy with fuel pump issues? Yep, it’s finally my turn to experience the joy of dealing with that particular problem.
For me, it’s on my 1993 Chevrolet Suburban K2500.
The Situation
So, with this sort of a project, there are two main ways to tackle it.
1- Drop the fuel tank out of the bottom.
2- Access the fuel pump from the top.
Now if you haven’t had the pleasure of dealing with this scenario yourself, let me break it down for you.
The correct service procedure is to drop the fuel tank from below and remove it entirely from the vehicle to service it as a unit. I’m working on a Suburban. That means a massive 42gal tank that can weigh up to 350lbs. Of course we all plan exactly when we are doing our fuel pumps, so we can make sure the tank is empty, right?
Of course I also had the benefit of this being an emergency project undertaken in the parking lot of my apartment complex.
Yeah, so I pretty much had to access the fuel pump from the top. On a pickup truck this is a potentially simple venture. Unbolt the bed, grab some buddies, and just remove it. Easy peasy.
On a Suburban, the process is a little more…invasive.
Ok, let me be real with you here. I had an empty tank of gas, and I probably could have dropped the tank. I also could have probably convinced the HOA that this wasn’t a “major repair” too. However, these trucks are known for their fuel pumps going out. Like a lot. So while I got relatively lucky with the fuel situation this time, I expect that to not be the case next time. As such, I opted for permanent servicability!
An access hatch.
I know I know. “how could I!,” “you are ruining the truck,” “that’s the lazy way.”
Well I’m likely going to be back in here, so why don’t I make it SO SO much easier for myself? So that’s what I did, but I approached the access hole with the end result in mind. Before I picked up a tool, I made a plan.
First, I want this to be easy to access down the road.
Second, this needs to feel like it could have been done from the factory.
Third, it needs to be done in one cut.
The Plan
Alright, let’s get into it now. The first requirement is pretty straightforward. If you’ve driven an old Chevy, you’ve heard the terrors that the fuel pumps can bring. Let’s just nip that in the bud here. Access panel. Removable. Effective.
Now, I’m a big fan of modifying stuff. Cars, trucks, houses, my kids’ toys. It doesn’t matter; I’m always learning and being creative. Here’s the thing though. I want these to be refined ideas that don’t encroach on normal everyday life. In this case, I wanted the access panel to match the corrugation of the floor of the truck and have no sharp edges with full support. This means I don’t have to worry about where my cargo lands.
That’s where the third requirement came in. If I had a doner truck, this wouldn’t be necessary.
So I have to lay out my lines and do a perfect job cutting the panel the very first time. This enables me to use the cut out part of the panel as the very door to cover it back up. It only requires extreme precision. Then I have to engineer a solution to actually hold the panel back in place and still be removable down the road. I think we will worry about that part later. Who really needs a plan anyway?
The Doing
Ok, so these pictures are a little after I started work on other portions of the Suburban, so they look a little different. I want to give some definitive answers for anyone doing this down the road. Real measurements. When I decided where to put this, I opted to choose midpoint on certain corrugations and tried to center everything up. I’m not gonna lie…I did this in a rush and ended up off center. With these photos, you could pretty much decide whatever size and placement of access hole you actually want and need.
All horizontal measurements are from the left or driver’s side of the truck. If you have the plastics installed, those are exactly 5” deep from the side of the steel floor/wall seam. All of my measurements are from the steel itself. From there-
Left edge- 21 inches
Right edge- 46 inches
All vertical? deep? From front to back? Those ones are all from the seam in the barn door weather seal. I do not know how this may translate to tailgate models.
Door/back edge- 15 inches
Cab/front edge- 27 inches
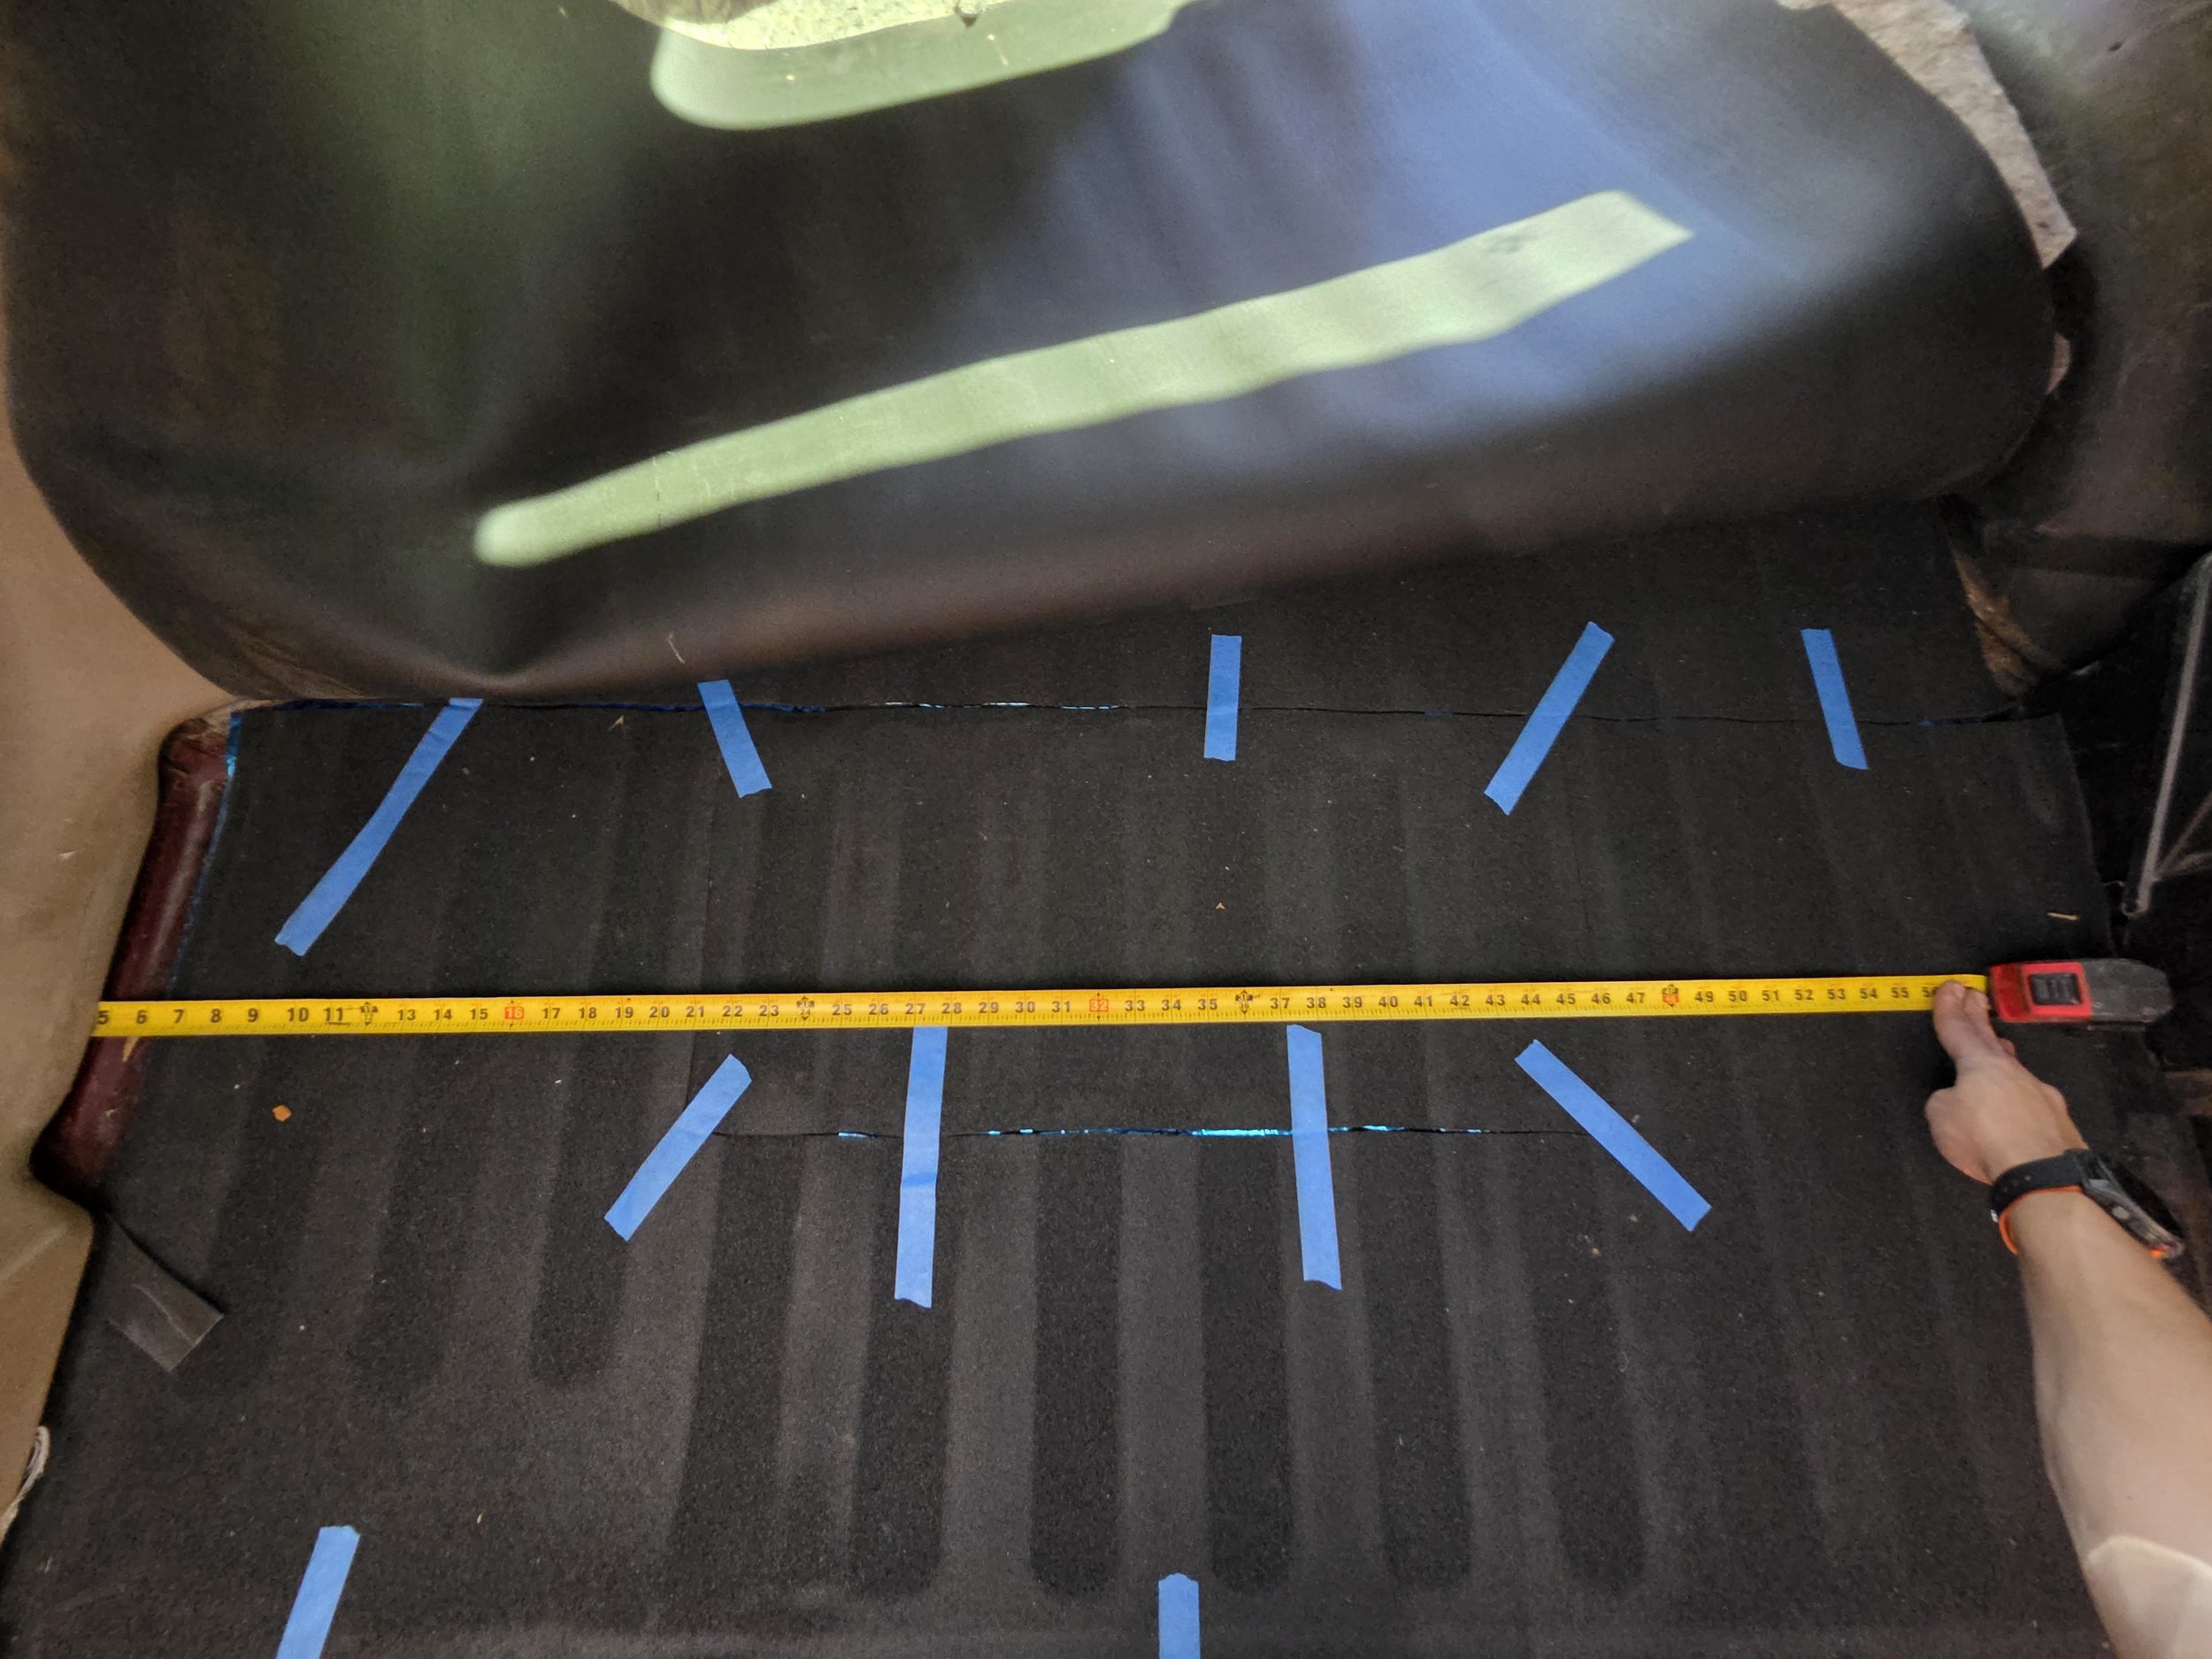
This is the floor in the back with CCF layered over some CLD.
Horizontal measurements here.
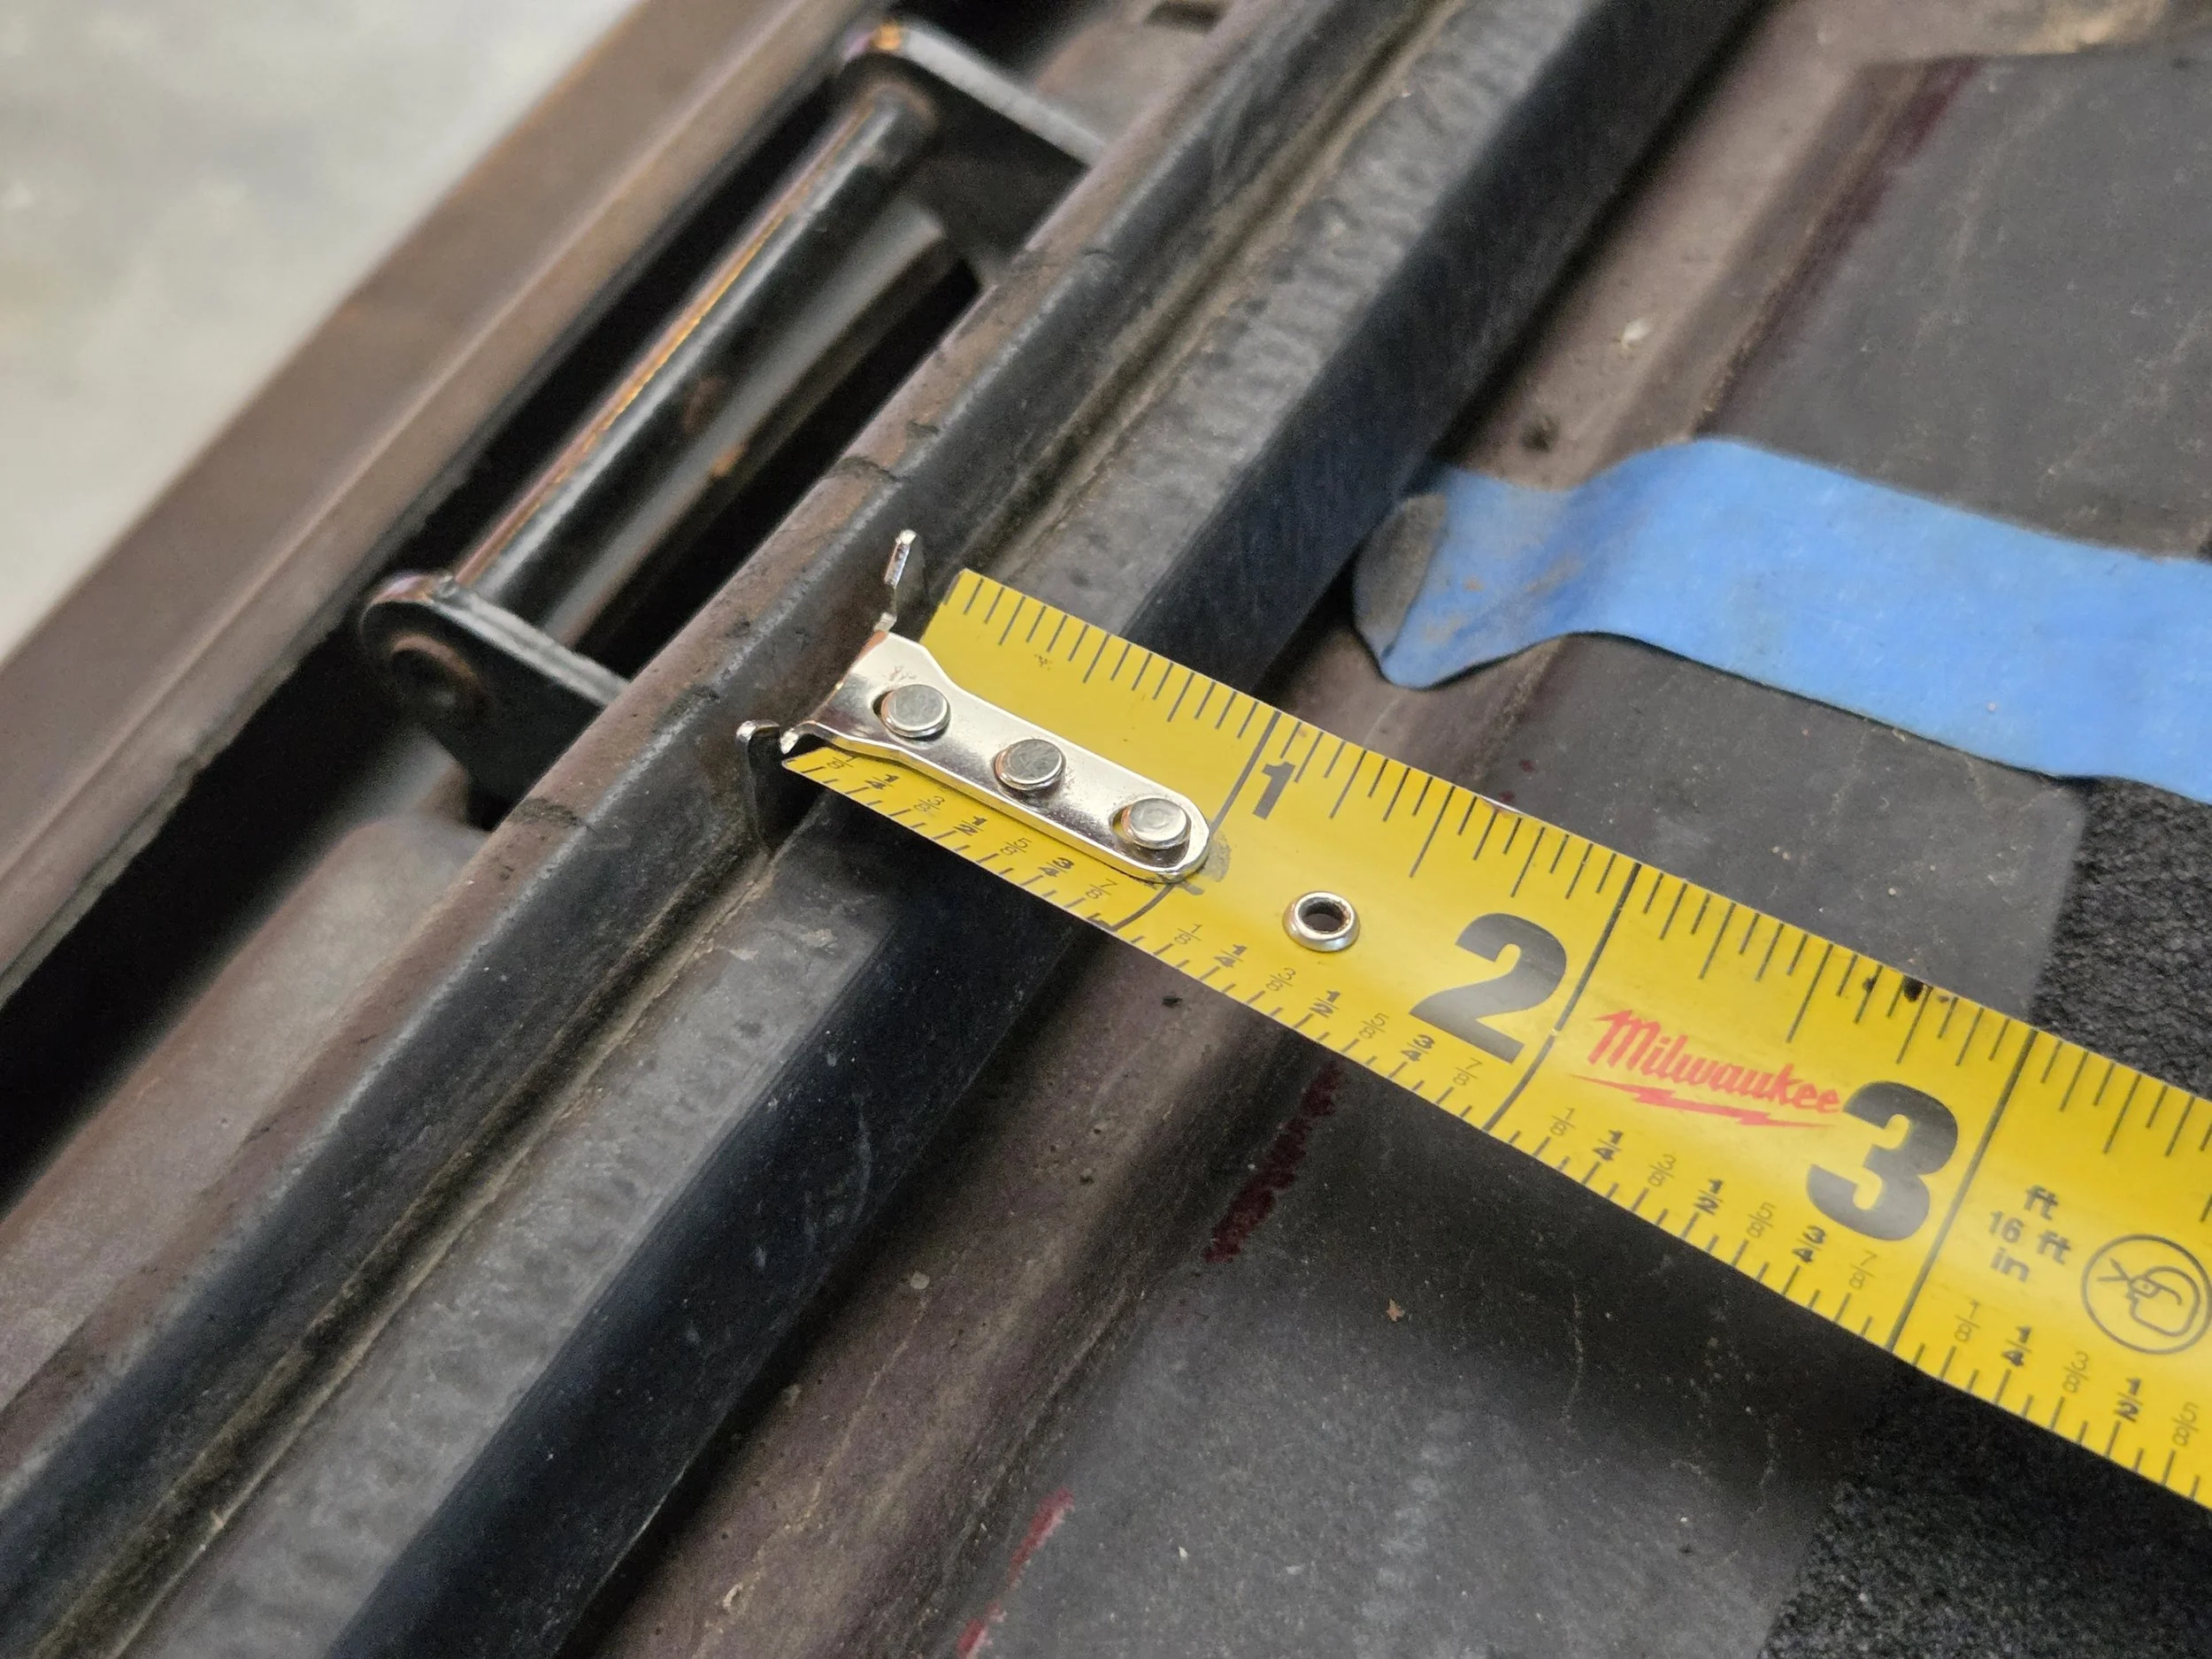
The barn door weatherstripping that I used for reference.
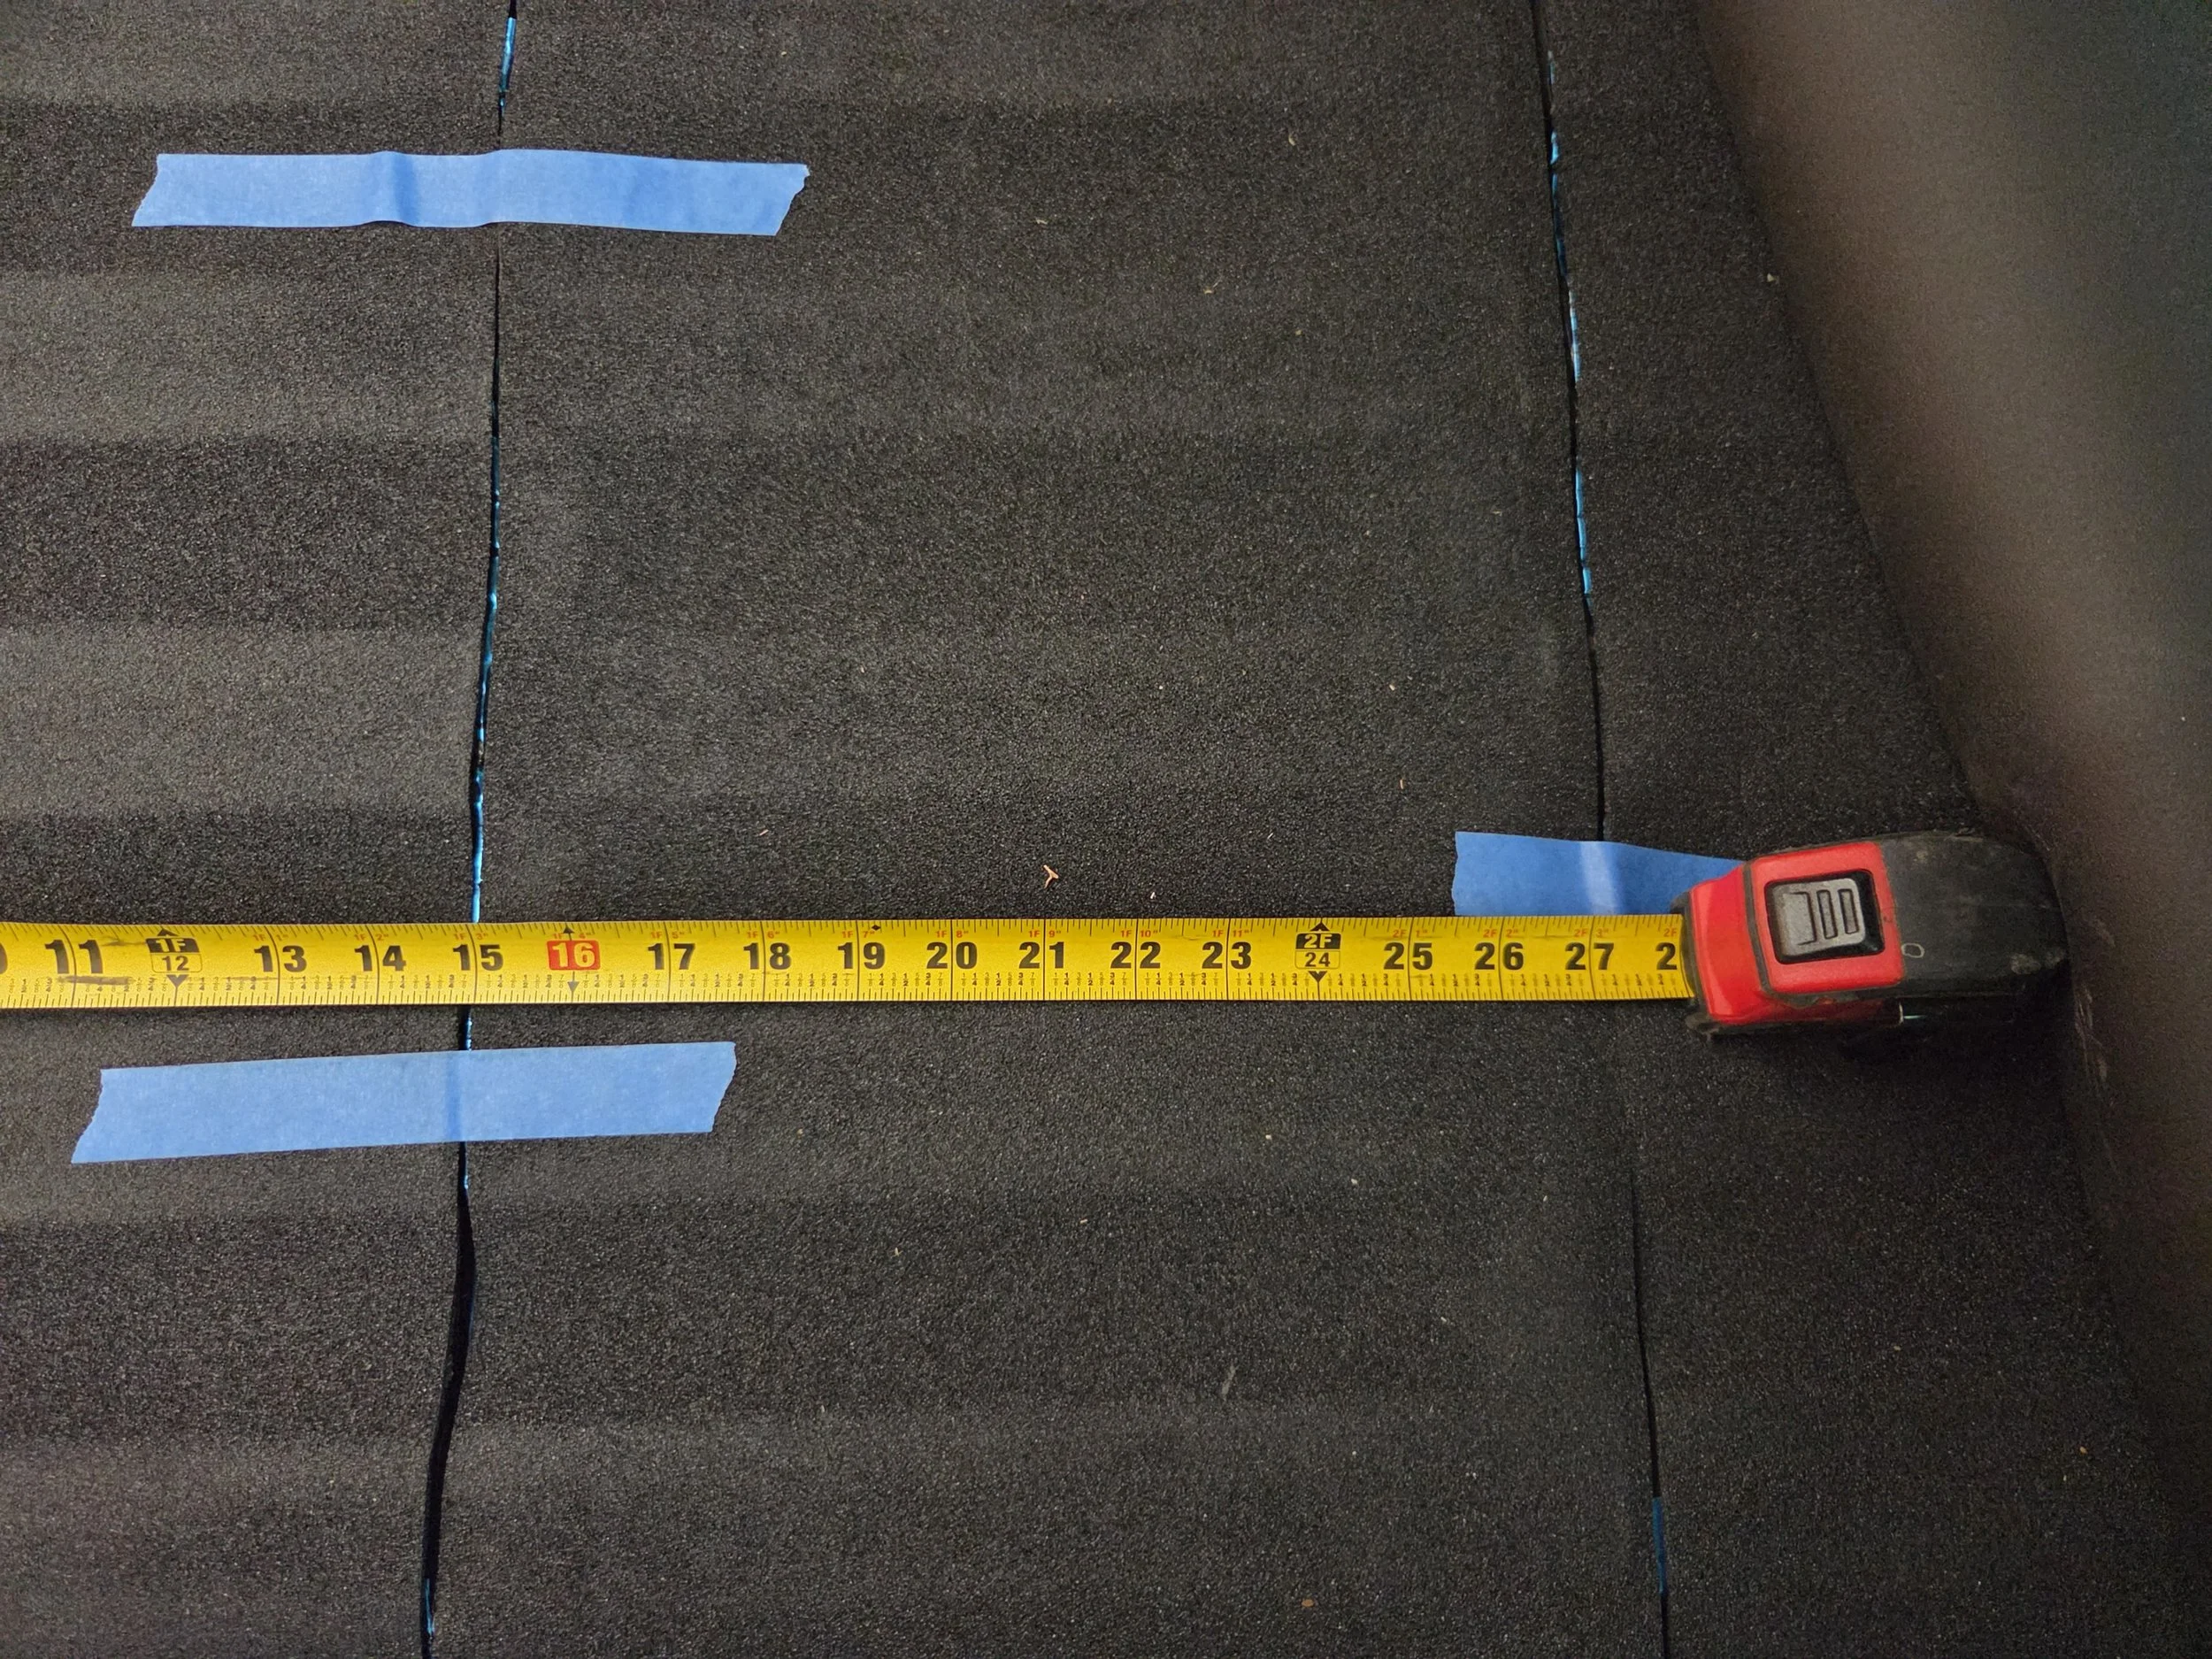
Vertical measurements here.
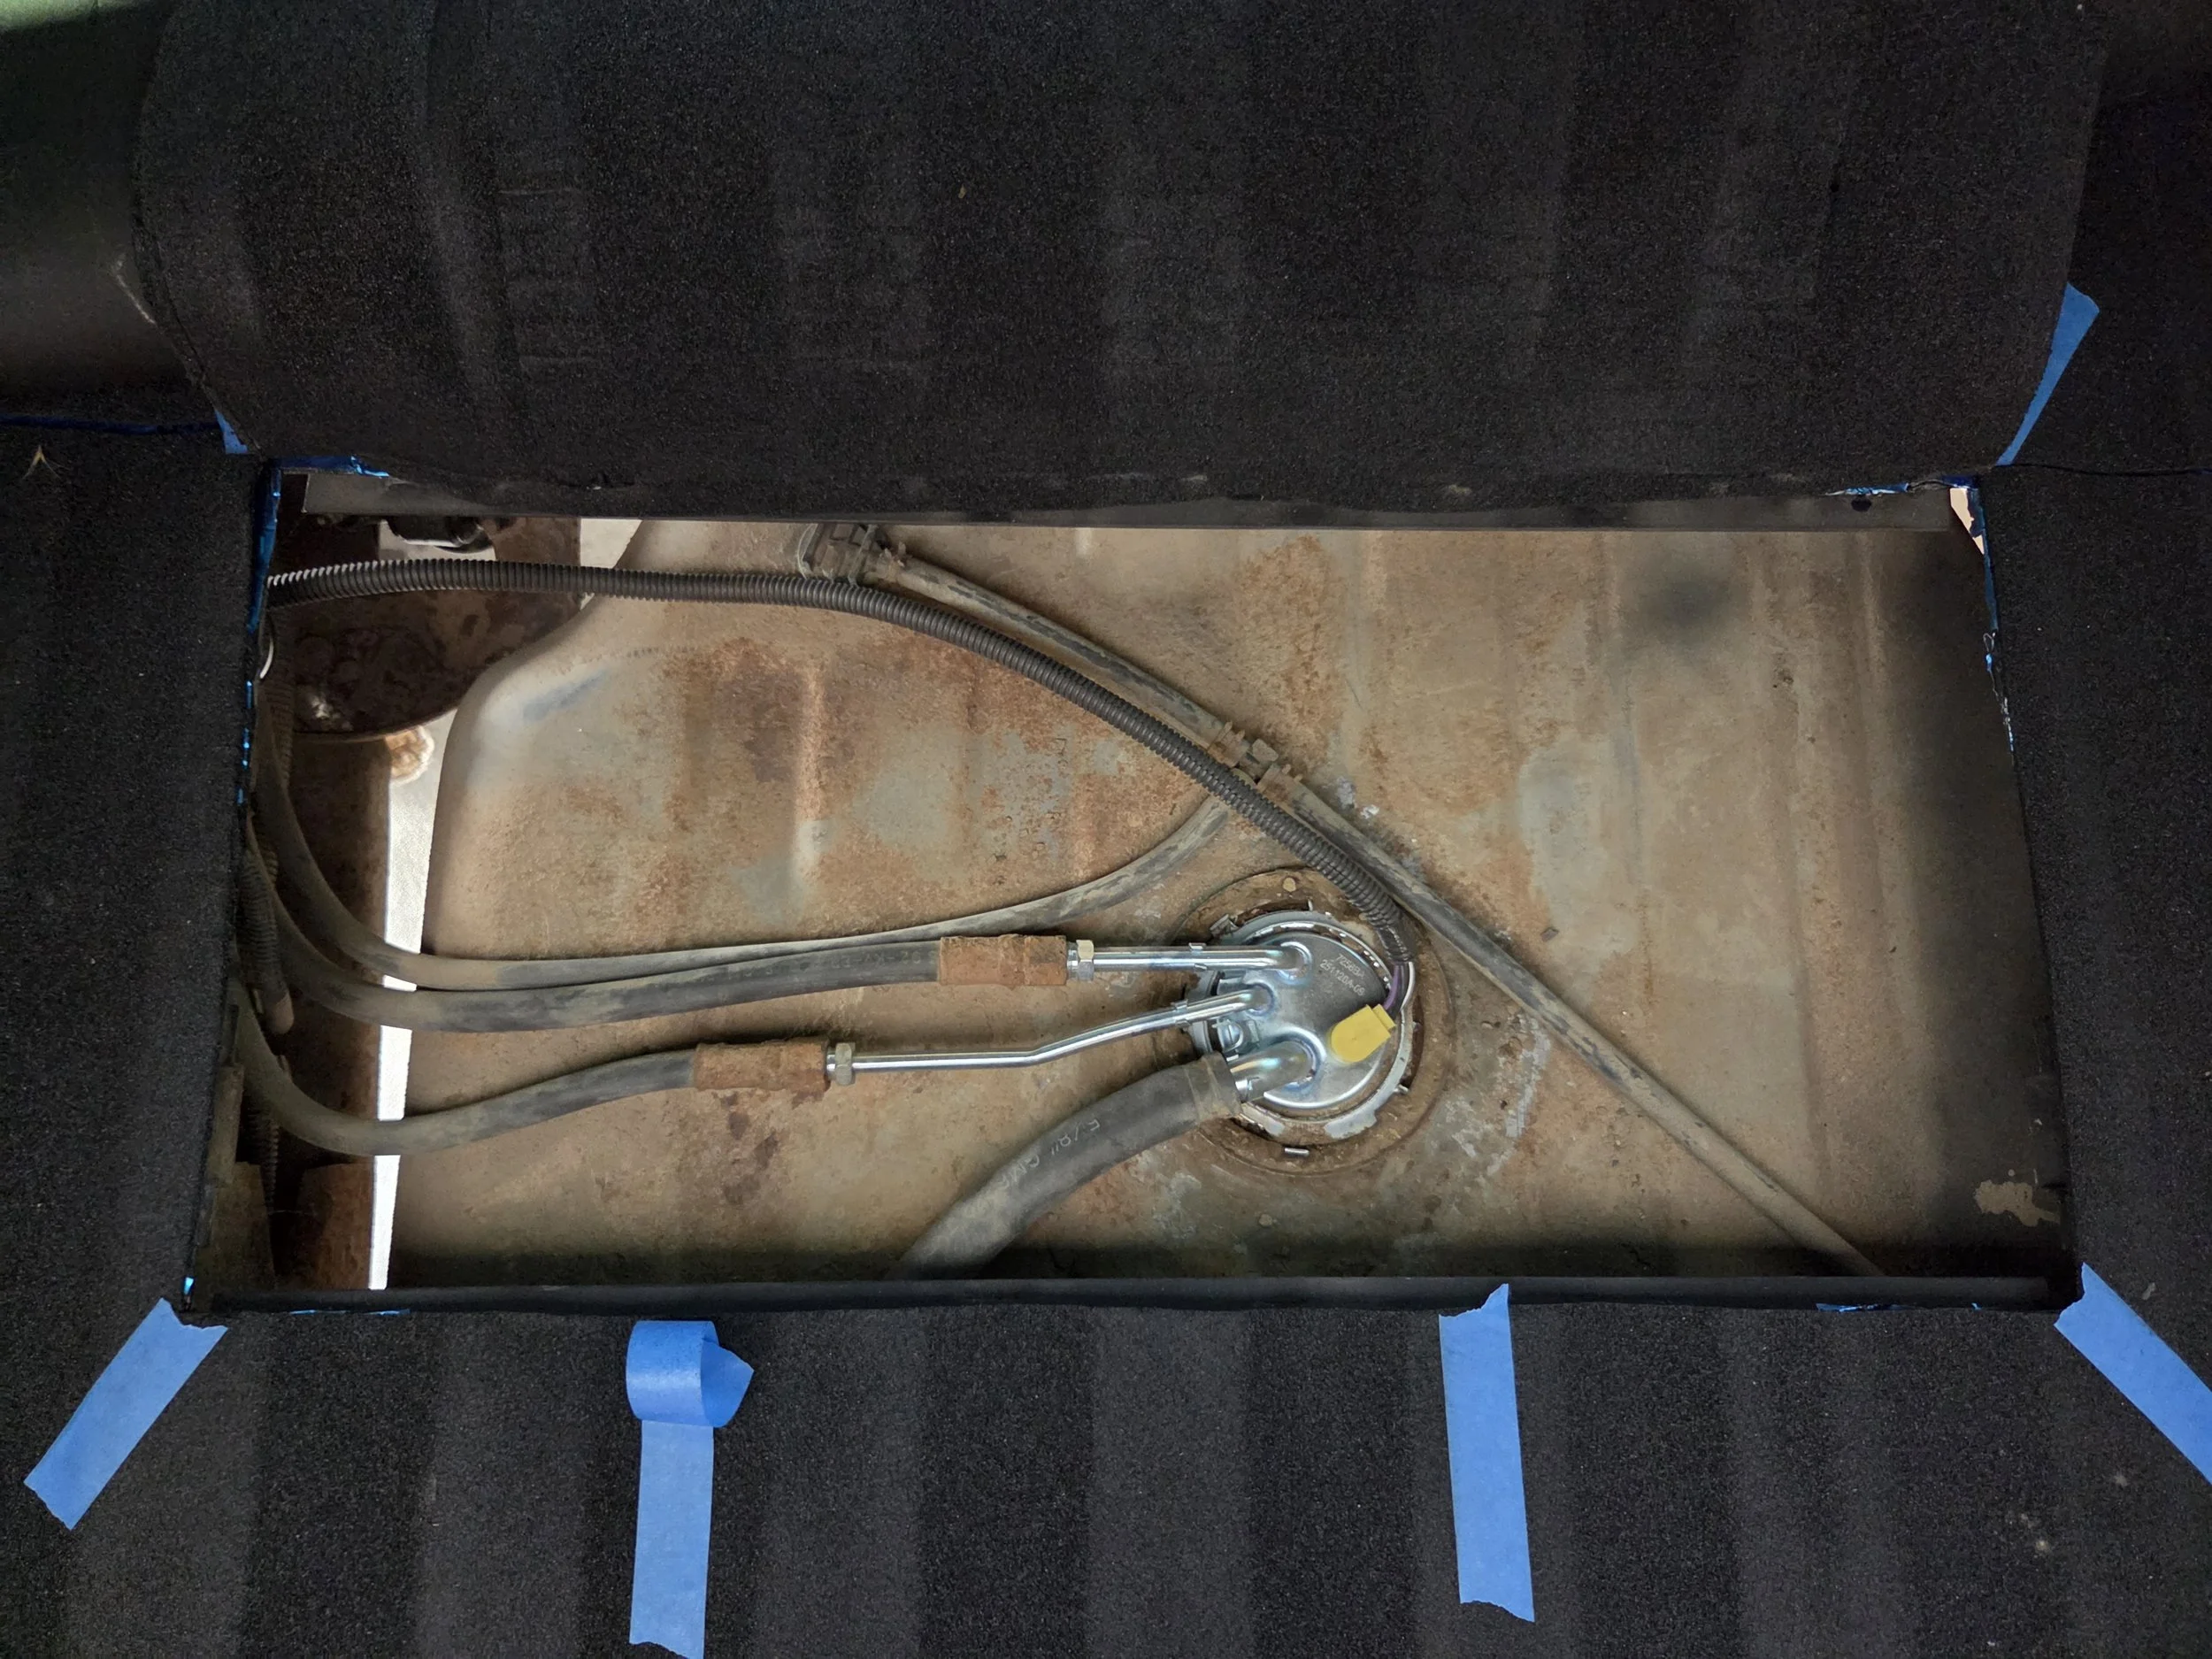
The actual opening.
As you can see, this access panel is MASSIVE. I personally have no issues with this. I enjoyed the space it provided, and I also feel like it gives me more space to work on a proper latching system. This gave me access to the pump, fittings, and even the grounding connector with space to spare. I honestly see no downsides.
While this is 25'“x12” you could certainly downsize it to 10”x6”. That would give you minimum access to the pump and fittings, assuming they all look just like mine.
Also, a nice little factiod I discovered here- my fuel pump is exactly 36 inches from the drivers side steel wall of the truck. It’s also about 19 inches from the barn door weatherstripping.
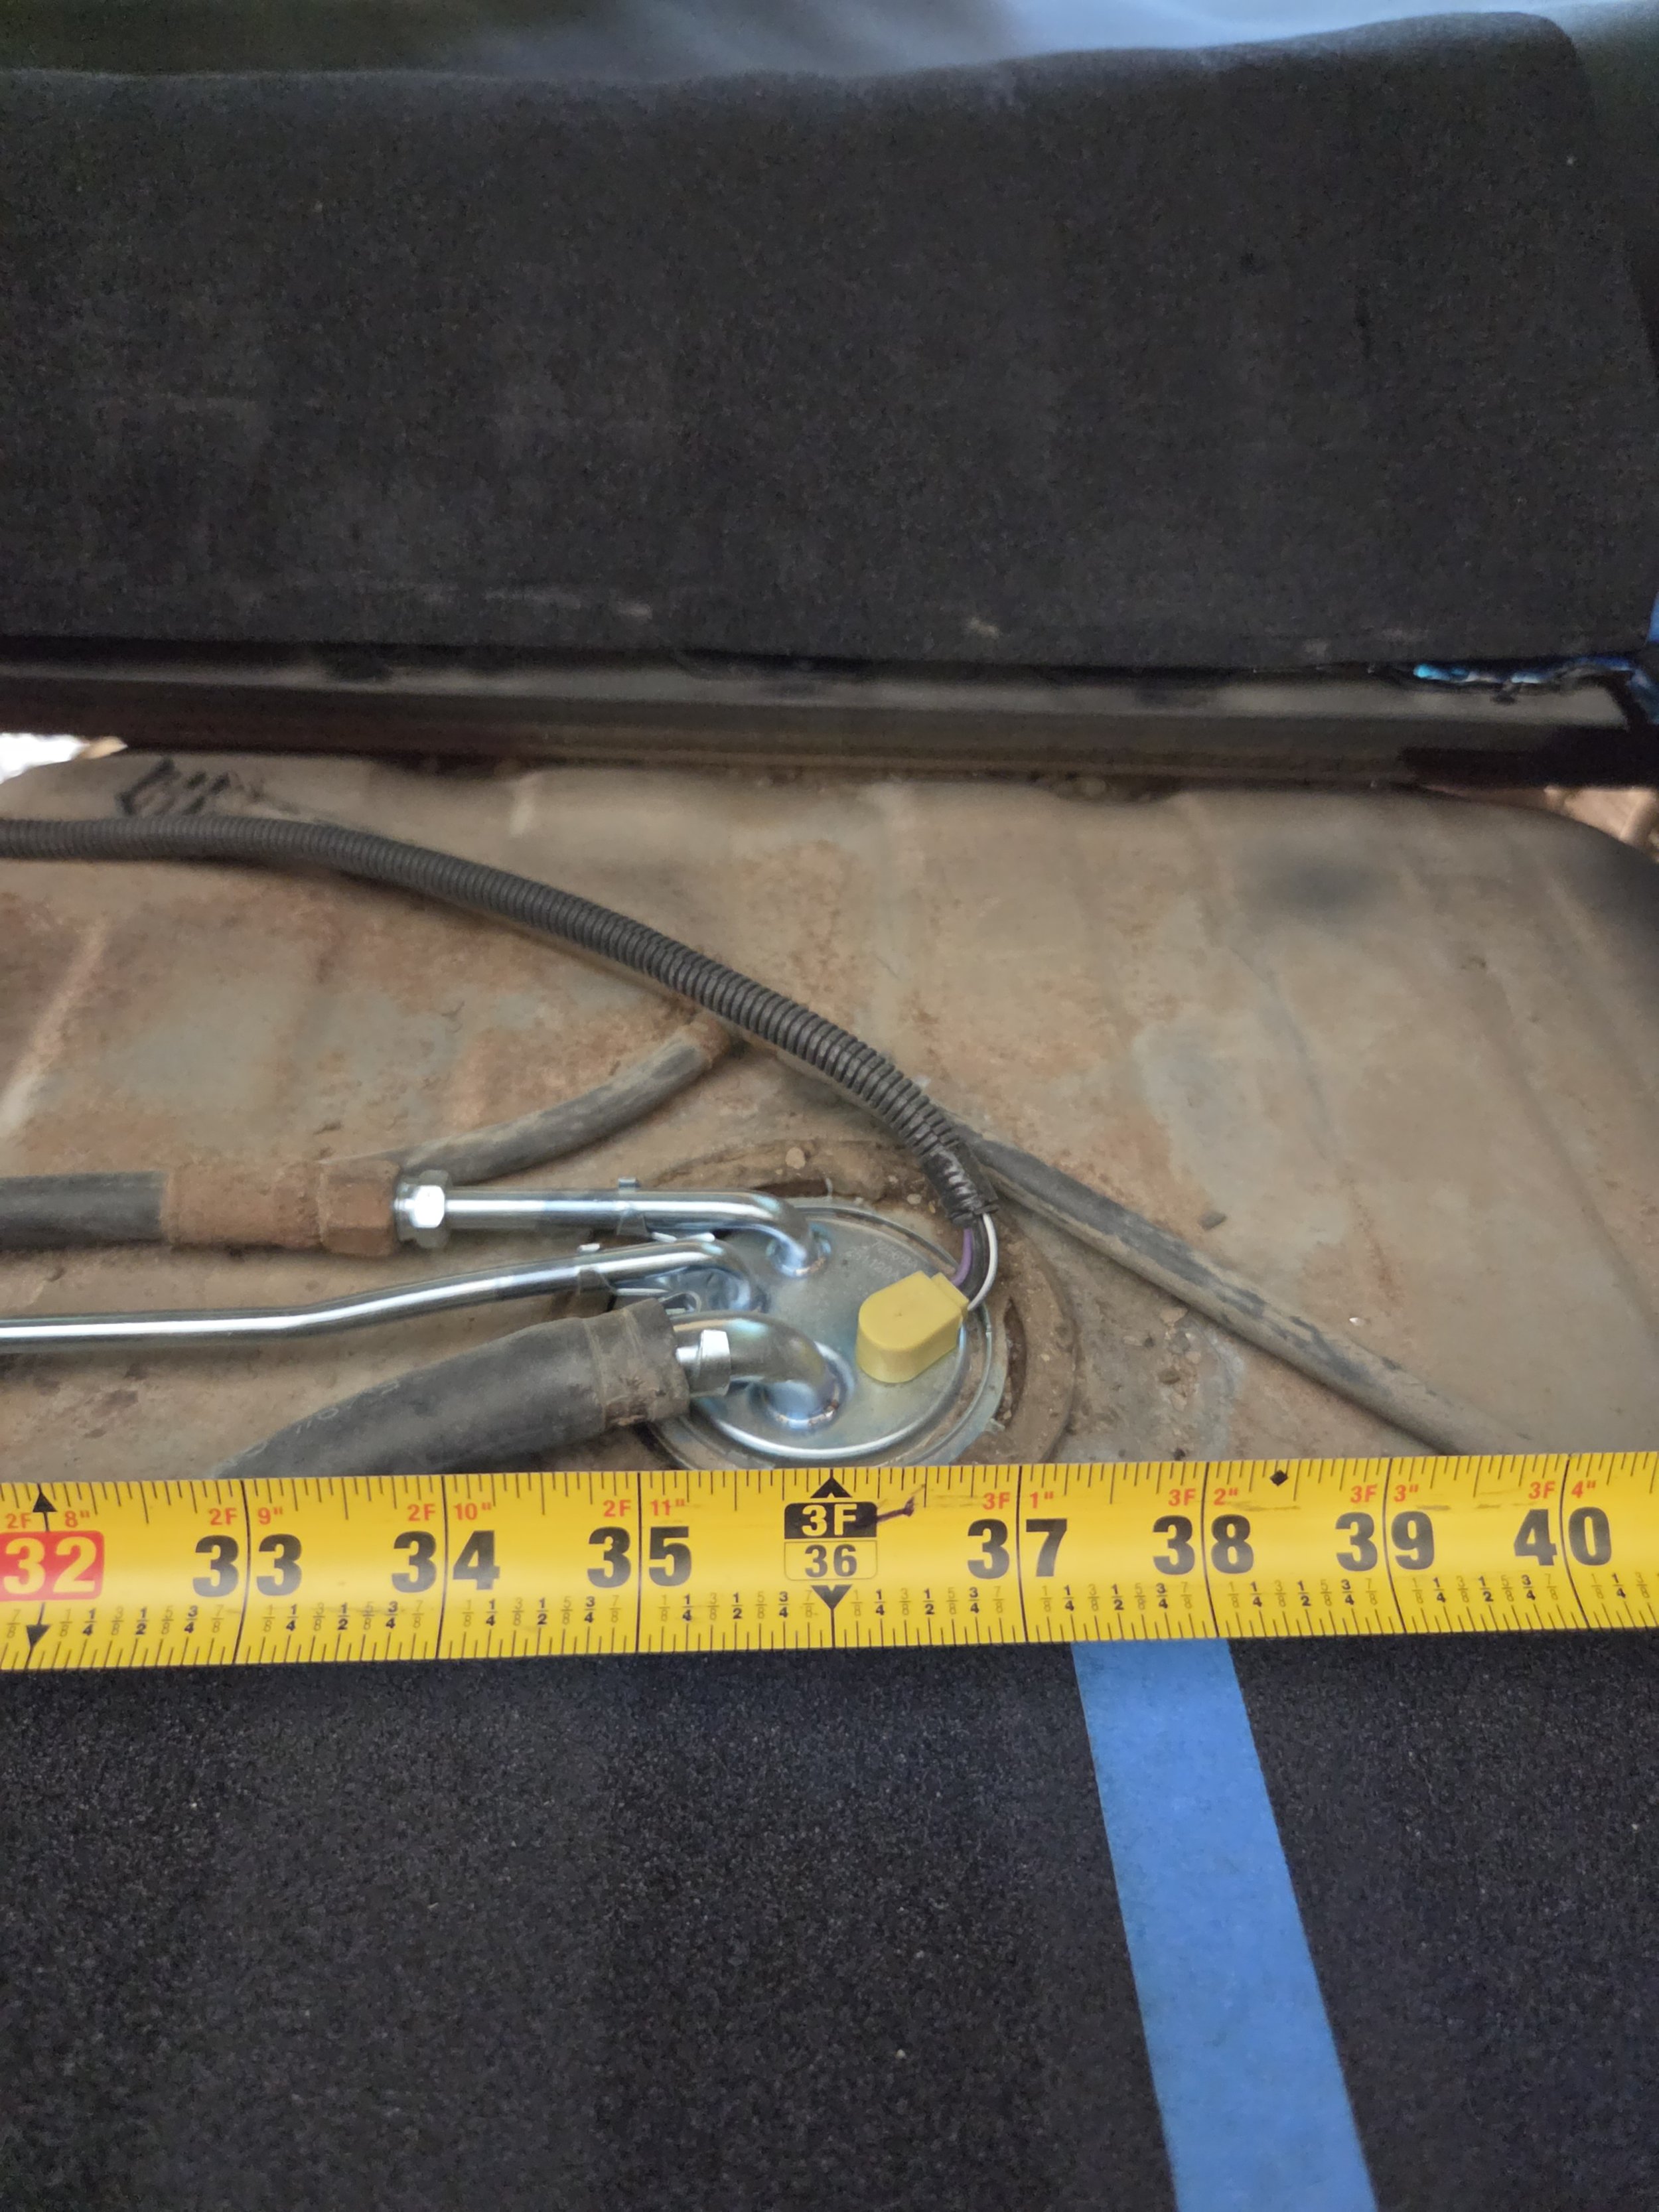
Measurement from driver’s side of truck.
The How
So we need to clarify how I actually cut this access panel. Brace yourself!
Grinder. Angle grinder and a sawzall.
I know this freaks a lot of people out. Throwing a bunch of sparks right around a fuel tank and all, I get it. I had no problems myself. I was personally more concerned with the possibility of puncturing the top of the tank, or cutting a line. That being said, make sure to take as many precautions you can to make this safe. Proper PPE, spark control, and a full fuel tank. Full means less vapors. The vapors are the dangerous part and what can actually ignite.
So yeah, I just laid out my lines and went to town with an angle grinder and a cutoff wheel. I did my best to keep it straight and clean and it worked out pretty well. The grinder works well and has a shallow cut, but I didn’t want to overcut my corners. I came back with my sawzall to finish those. The big thing with the saw is being very very careful to keep a shallow cut. They tend to grab, which is why I avoided it for the majority of the cut and decided to throw sparks instead.
There is also a cross brace under the floor here that has to be cut. It runs directly over the fuel pump, so it’s not an option. I was able to finish those off with the saw as well, just keeping the blade as shallow as possible.
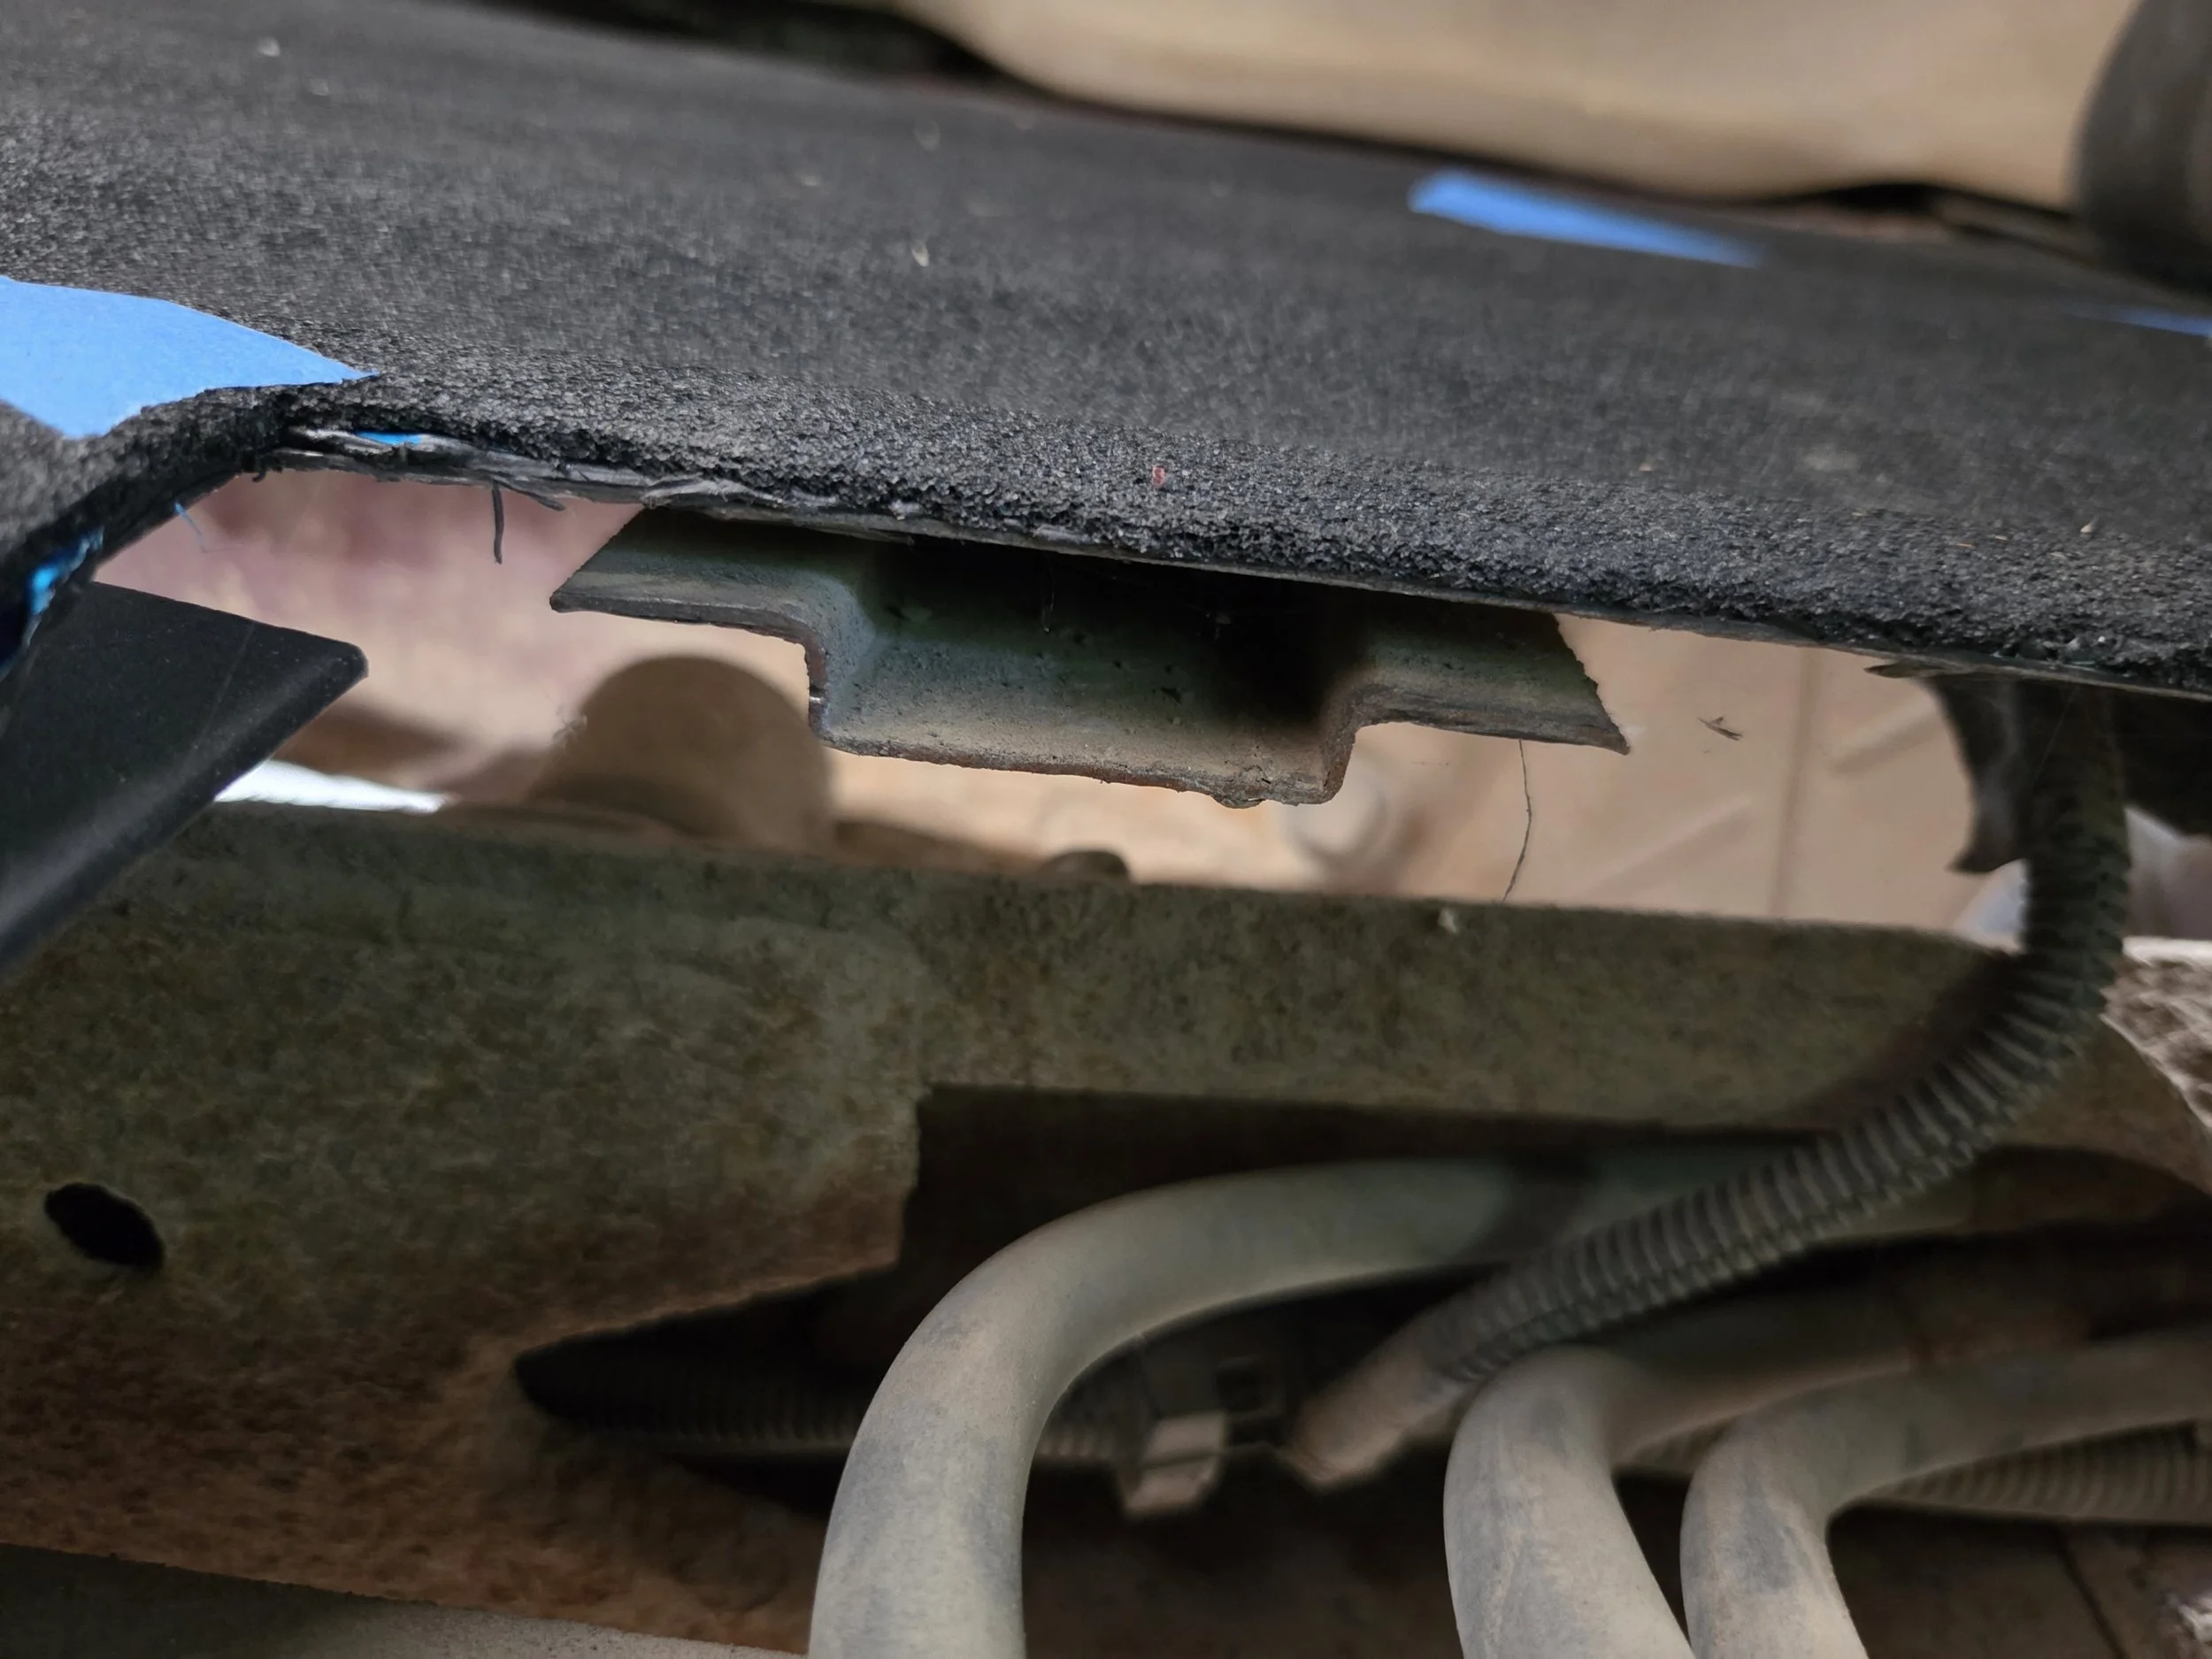
End view of the cross brace I cut.
With the access panel cut, swapping the fuel pump was actually really easy for me. Even these crusty rusty lines broke free on the truck side without issue. The pump side ended up with the nut rust welded onto the hardline, so I had to twist the rubber hose a couple of turns to unscrew it, but there was enough give in the hose to do so.
Once the lines are freed up, there’s a bunch of waxy stuff they put on the main retaining ring around the pump itself. This all needs scraped away and cleaned up really good. Make sure there is no chance of any junk falling into the tank.
Finally, make sure to disconnect the pigtail and grounding wire before attempting to remove the pump. This is one of those steps that’s way easier with the giant access hole. If you cut it smaller, you may need to do this step from below. I was able to reach it from above, and took the opportunity to clean up the grounding location.
From there, it’s a case of reversing those steps and installing your new pump. I highly recommend pausing after install and testing it straight away. If you have a bad one, now would be a good time to know. That being said, we do now have a convenient access panel!
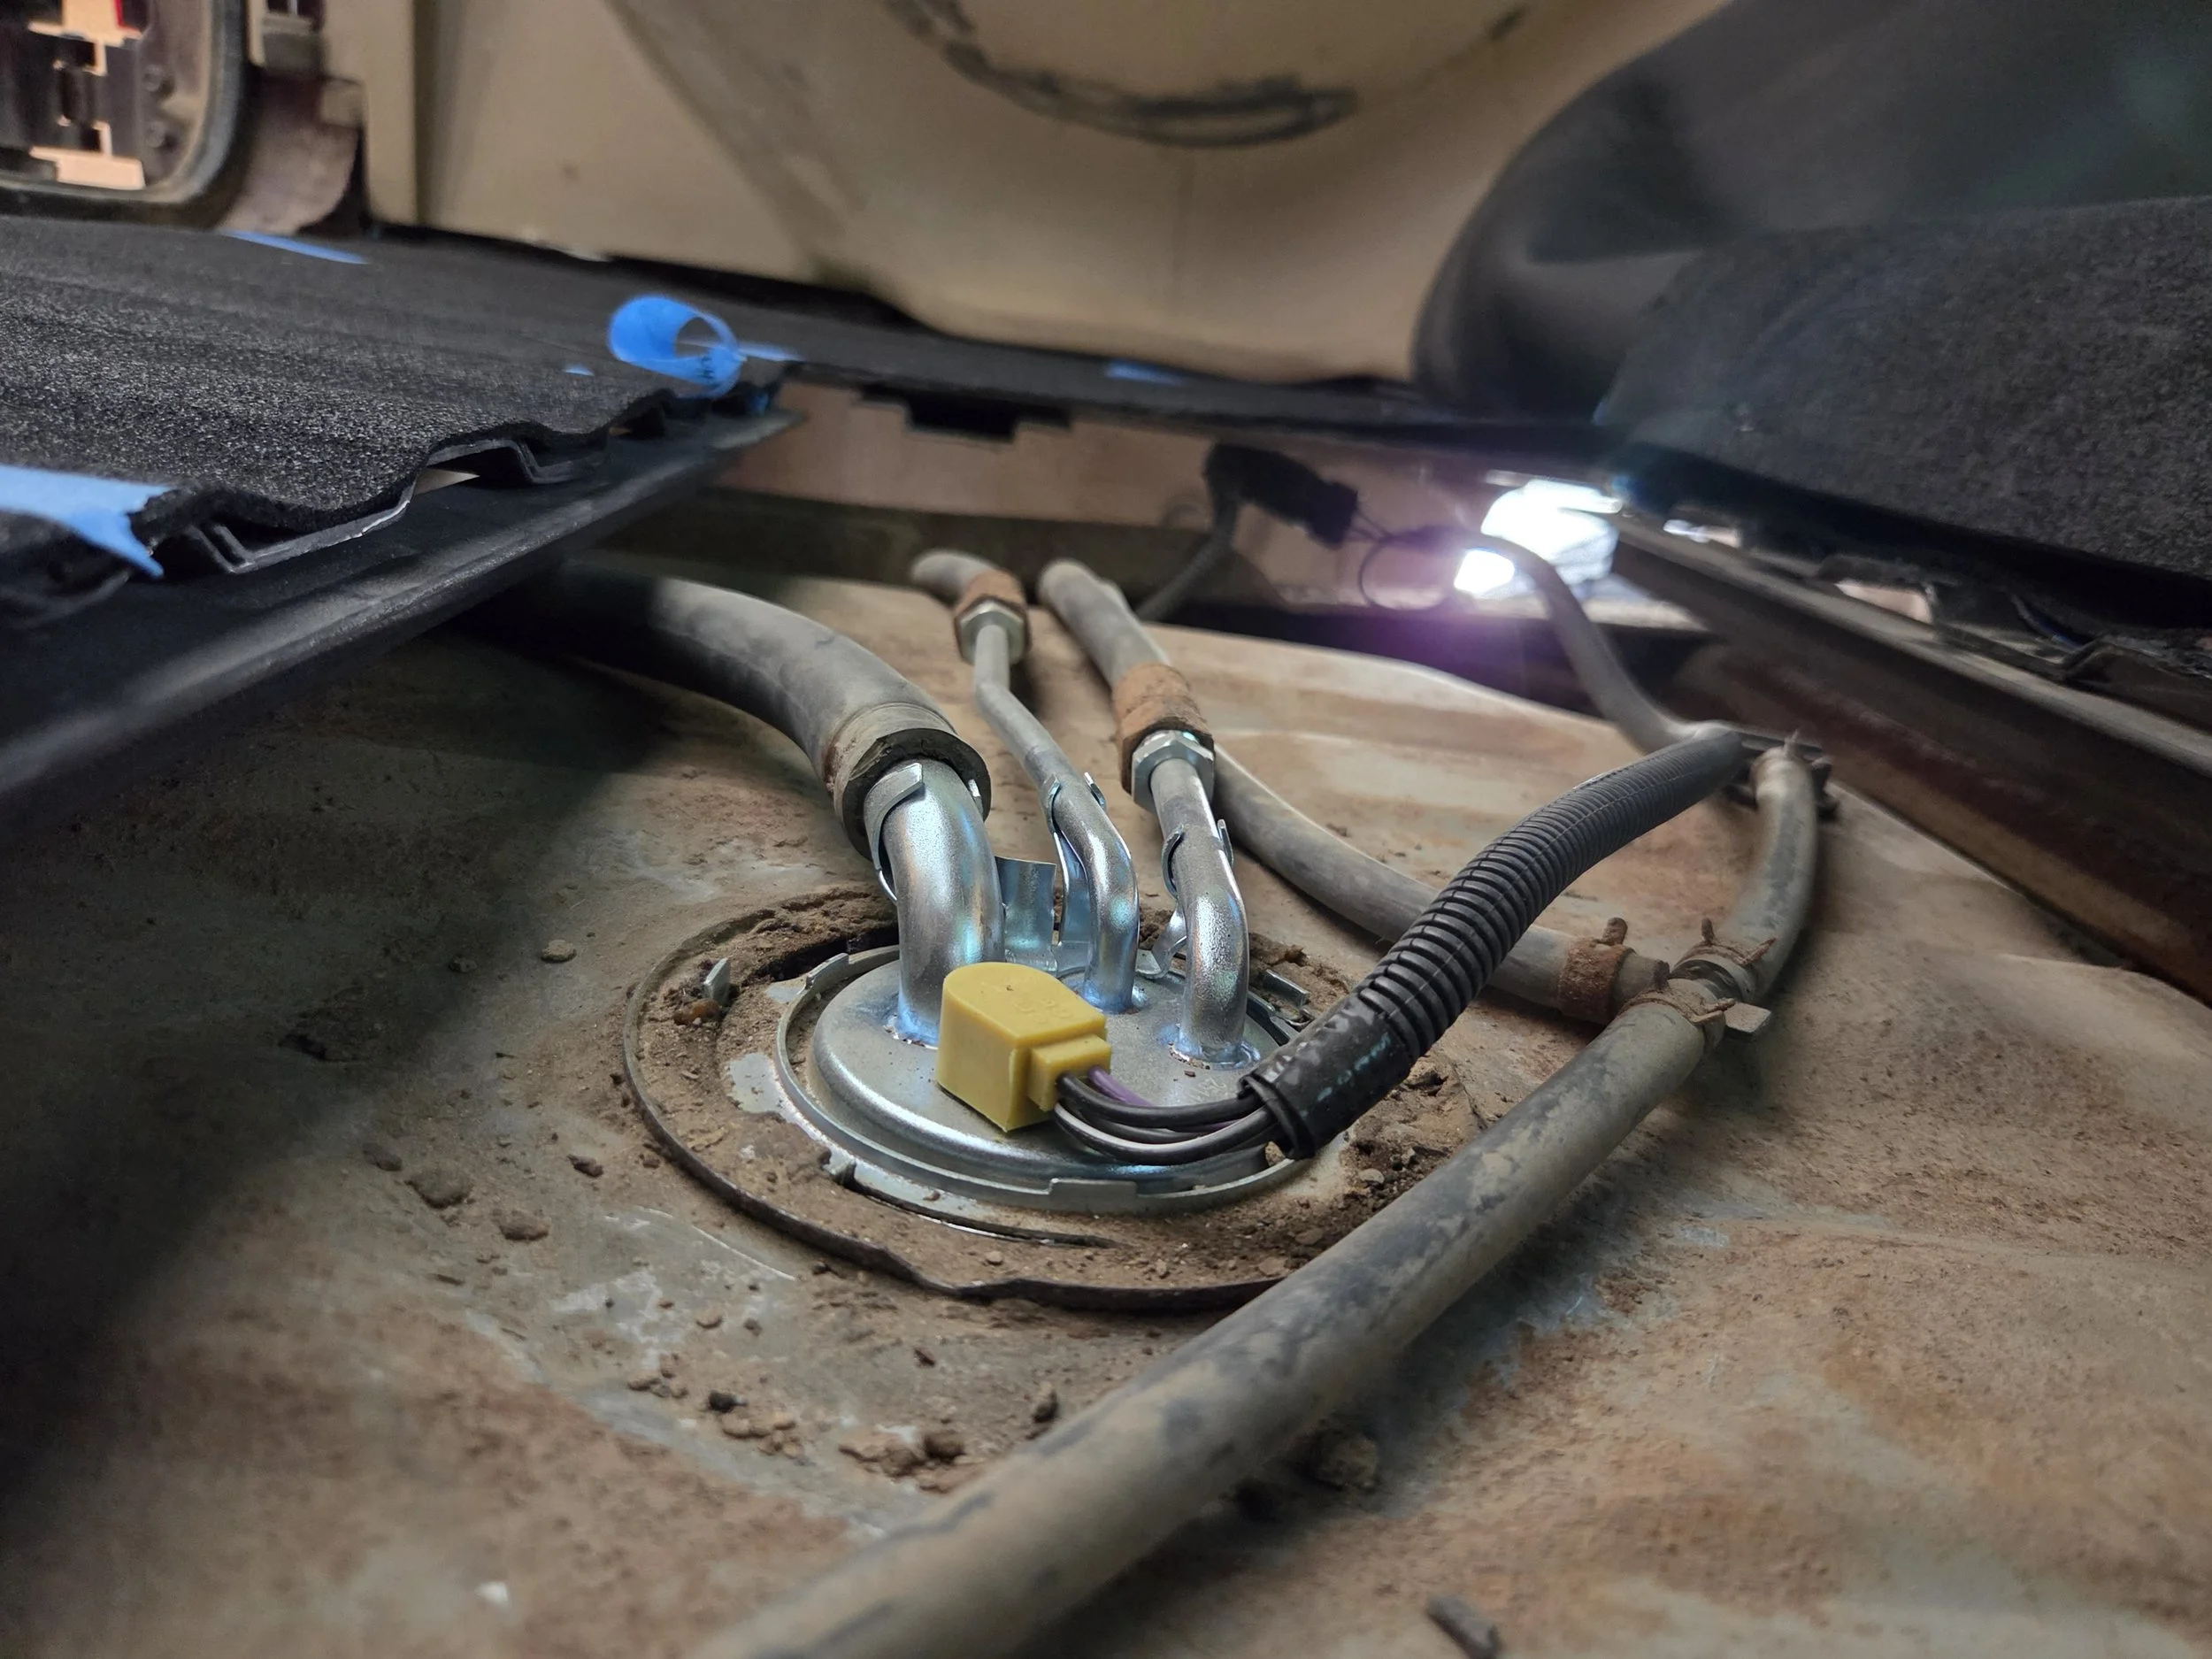
Now, I’m still working on the latch and quick access aspects of this project. For now, I did get the panel set back into place and fully supported to allow me to use the truck until I could get back to it. TO do so, I used 1 inch angle steel that I drilled and tapped holes in. On the truck side I simply drilled holes in the lower corrugations. Then I bolted them into place. If I didn’t have a fuel tank right there, I’d consider welding it.
And that’s how this project sits right now. I have plans to continue it more and refine it to meet requirement 2, but life does happen so that’ll have to happen later.